
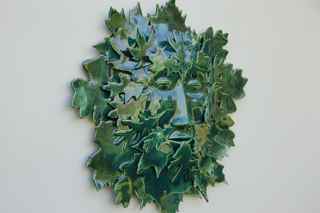
I recently got a commission to make a Green man and I took the opportunity to document the process.
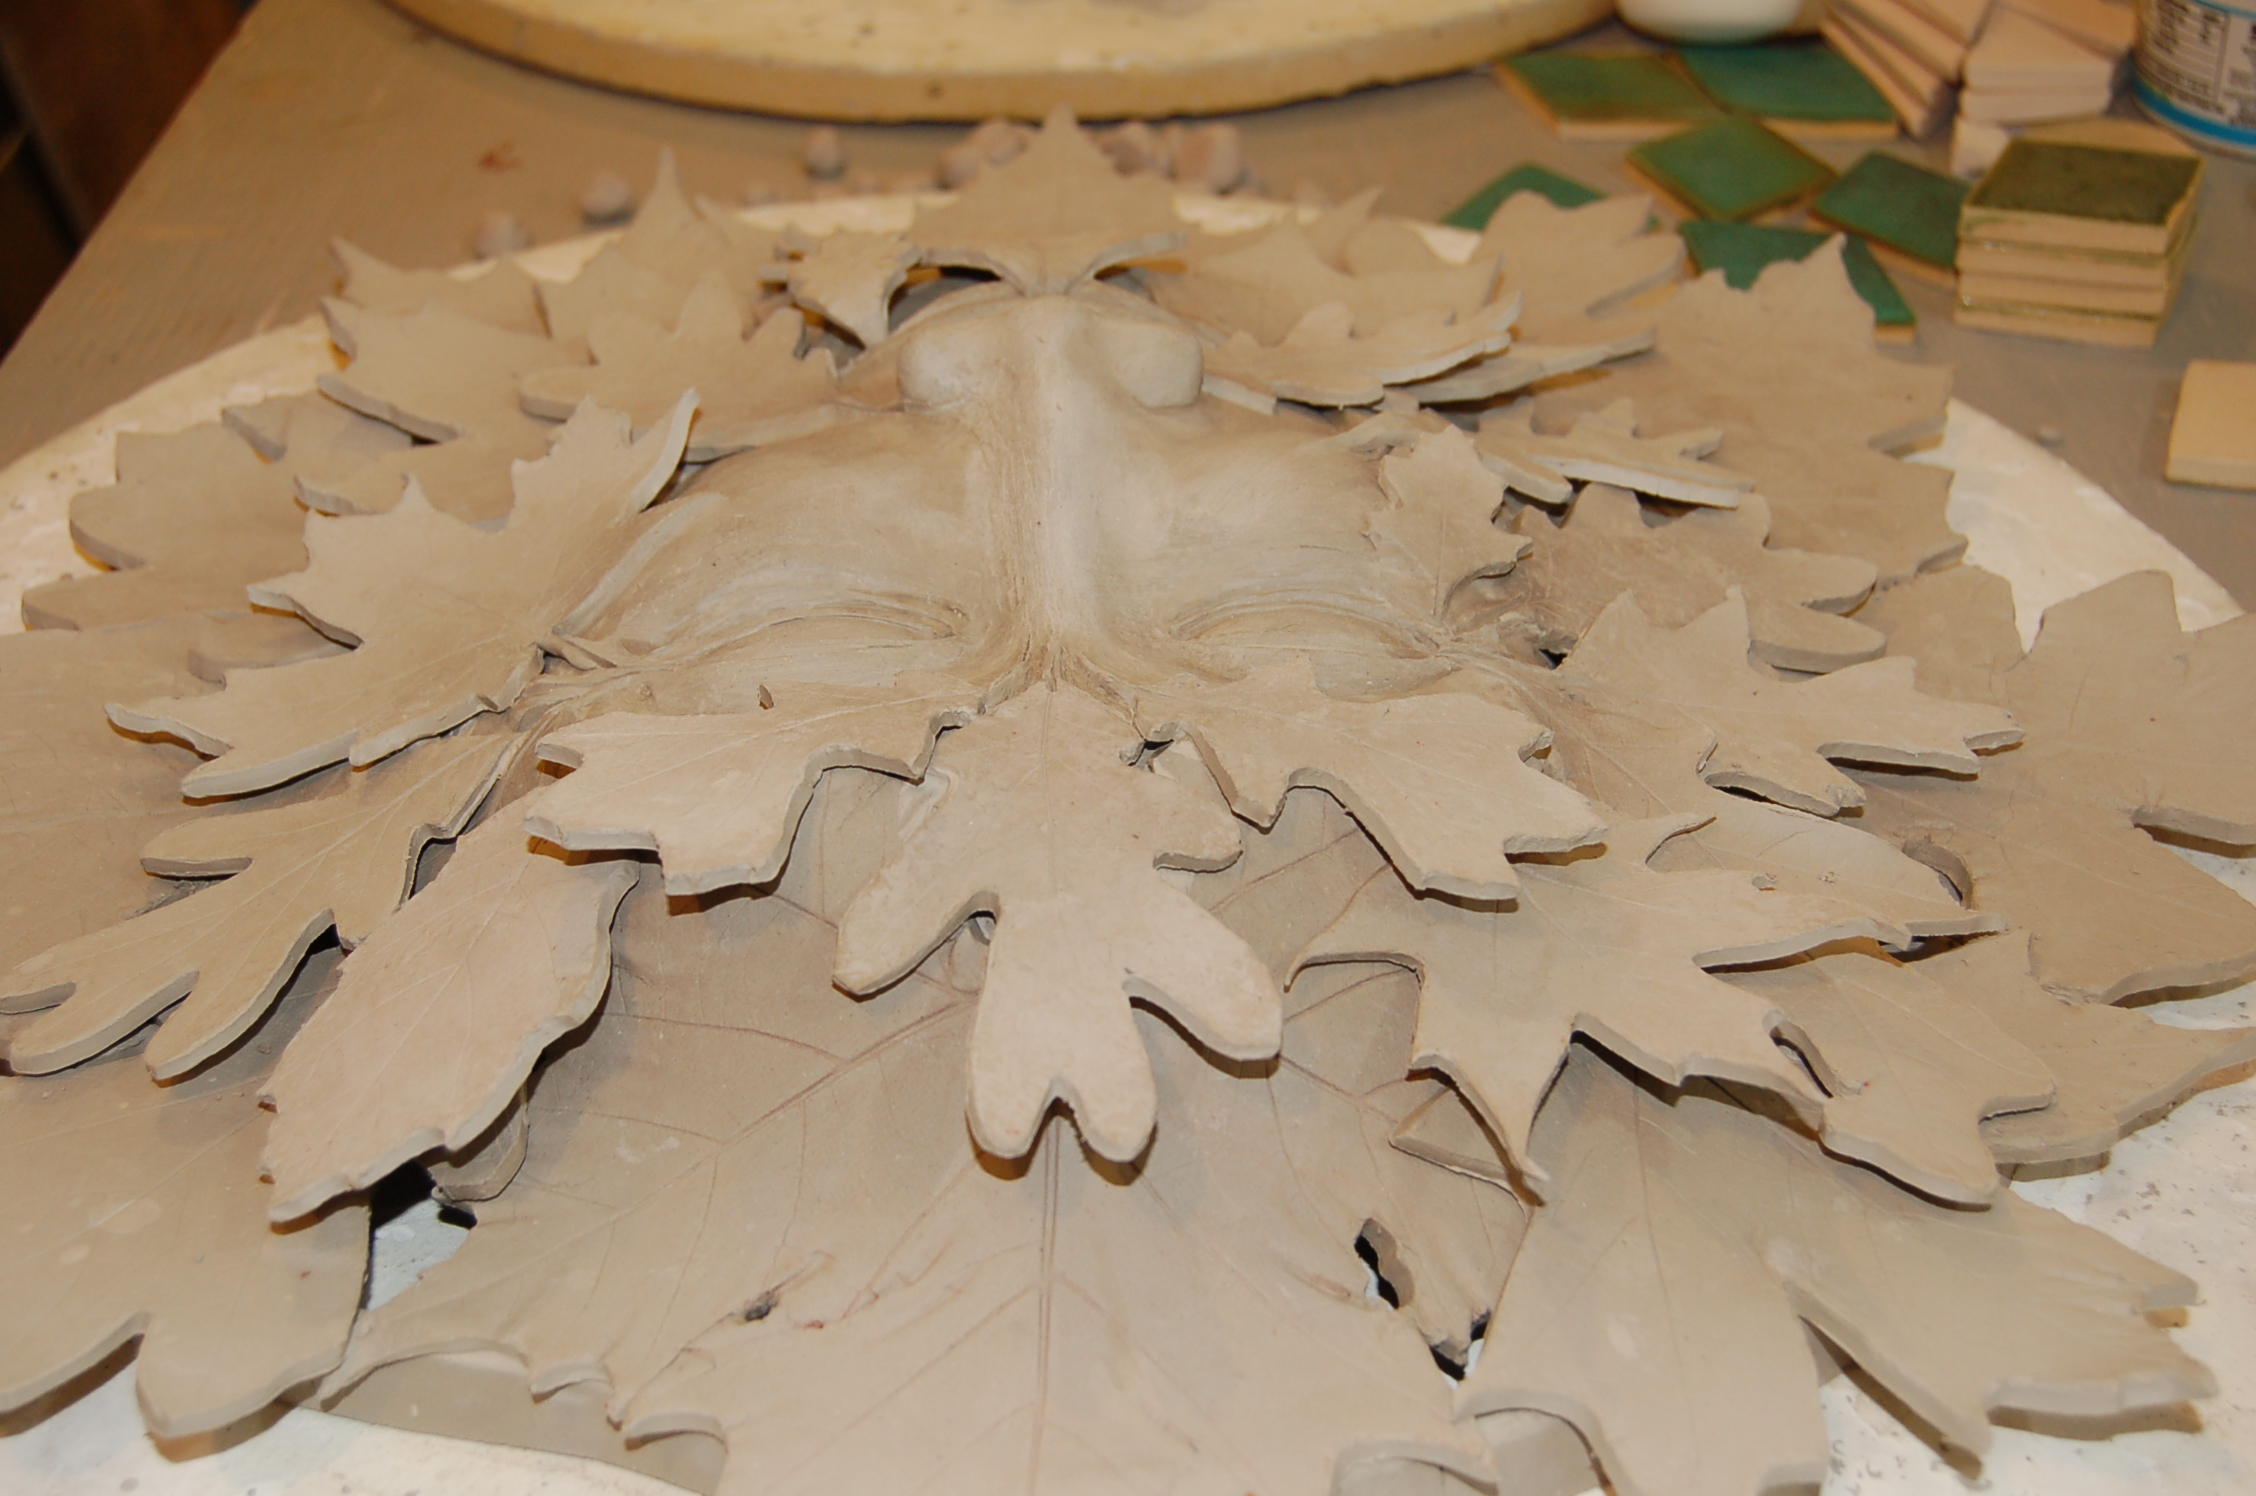
I make my green men and women using basic hand building techniques. I start with a large lump of clay 5-6 pounds and I form a shallow bowl just like a large pinch pot, slowly pressing into the lump and squeezing until I have an oval shape that is 1/2 – 1″ thick, and the sides are 2-3″ tall. The bowl shape is about the size of a large face. I go large because fired clay shrinks with each firing and I want them to be on the monumental side.
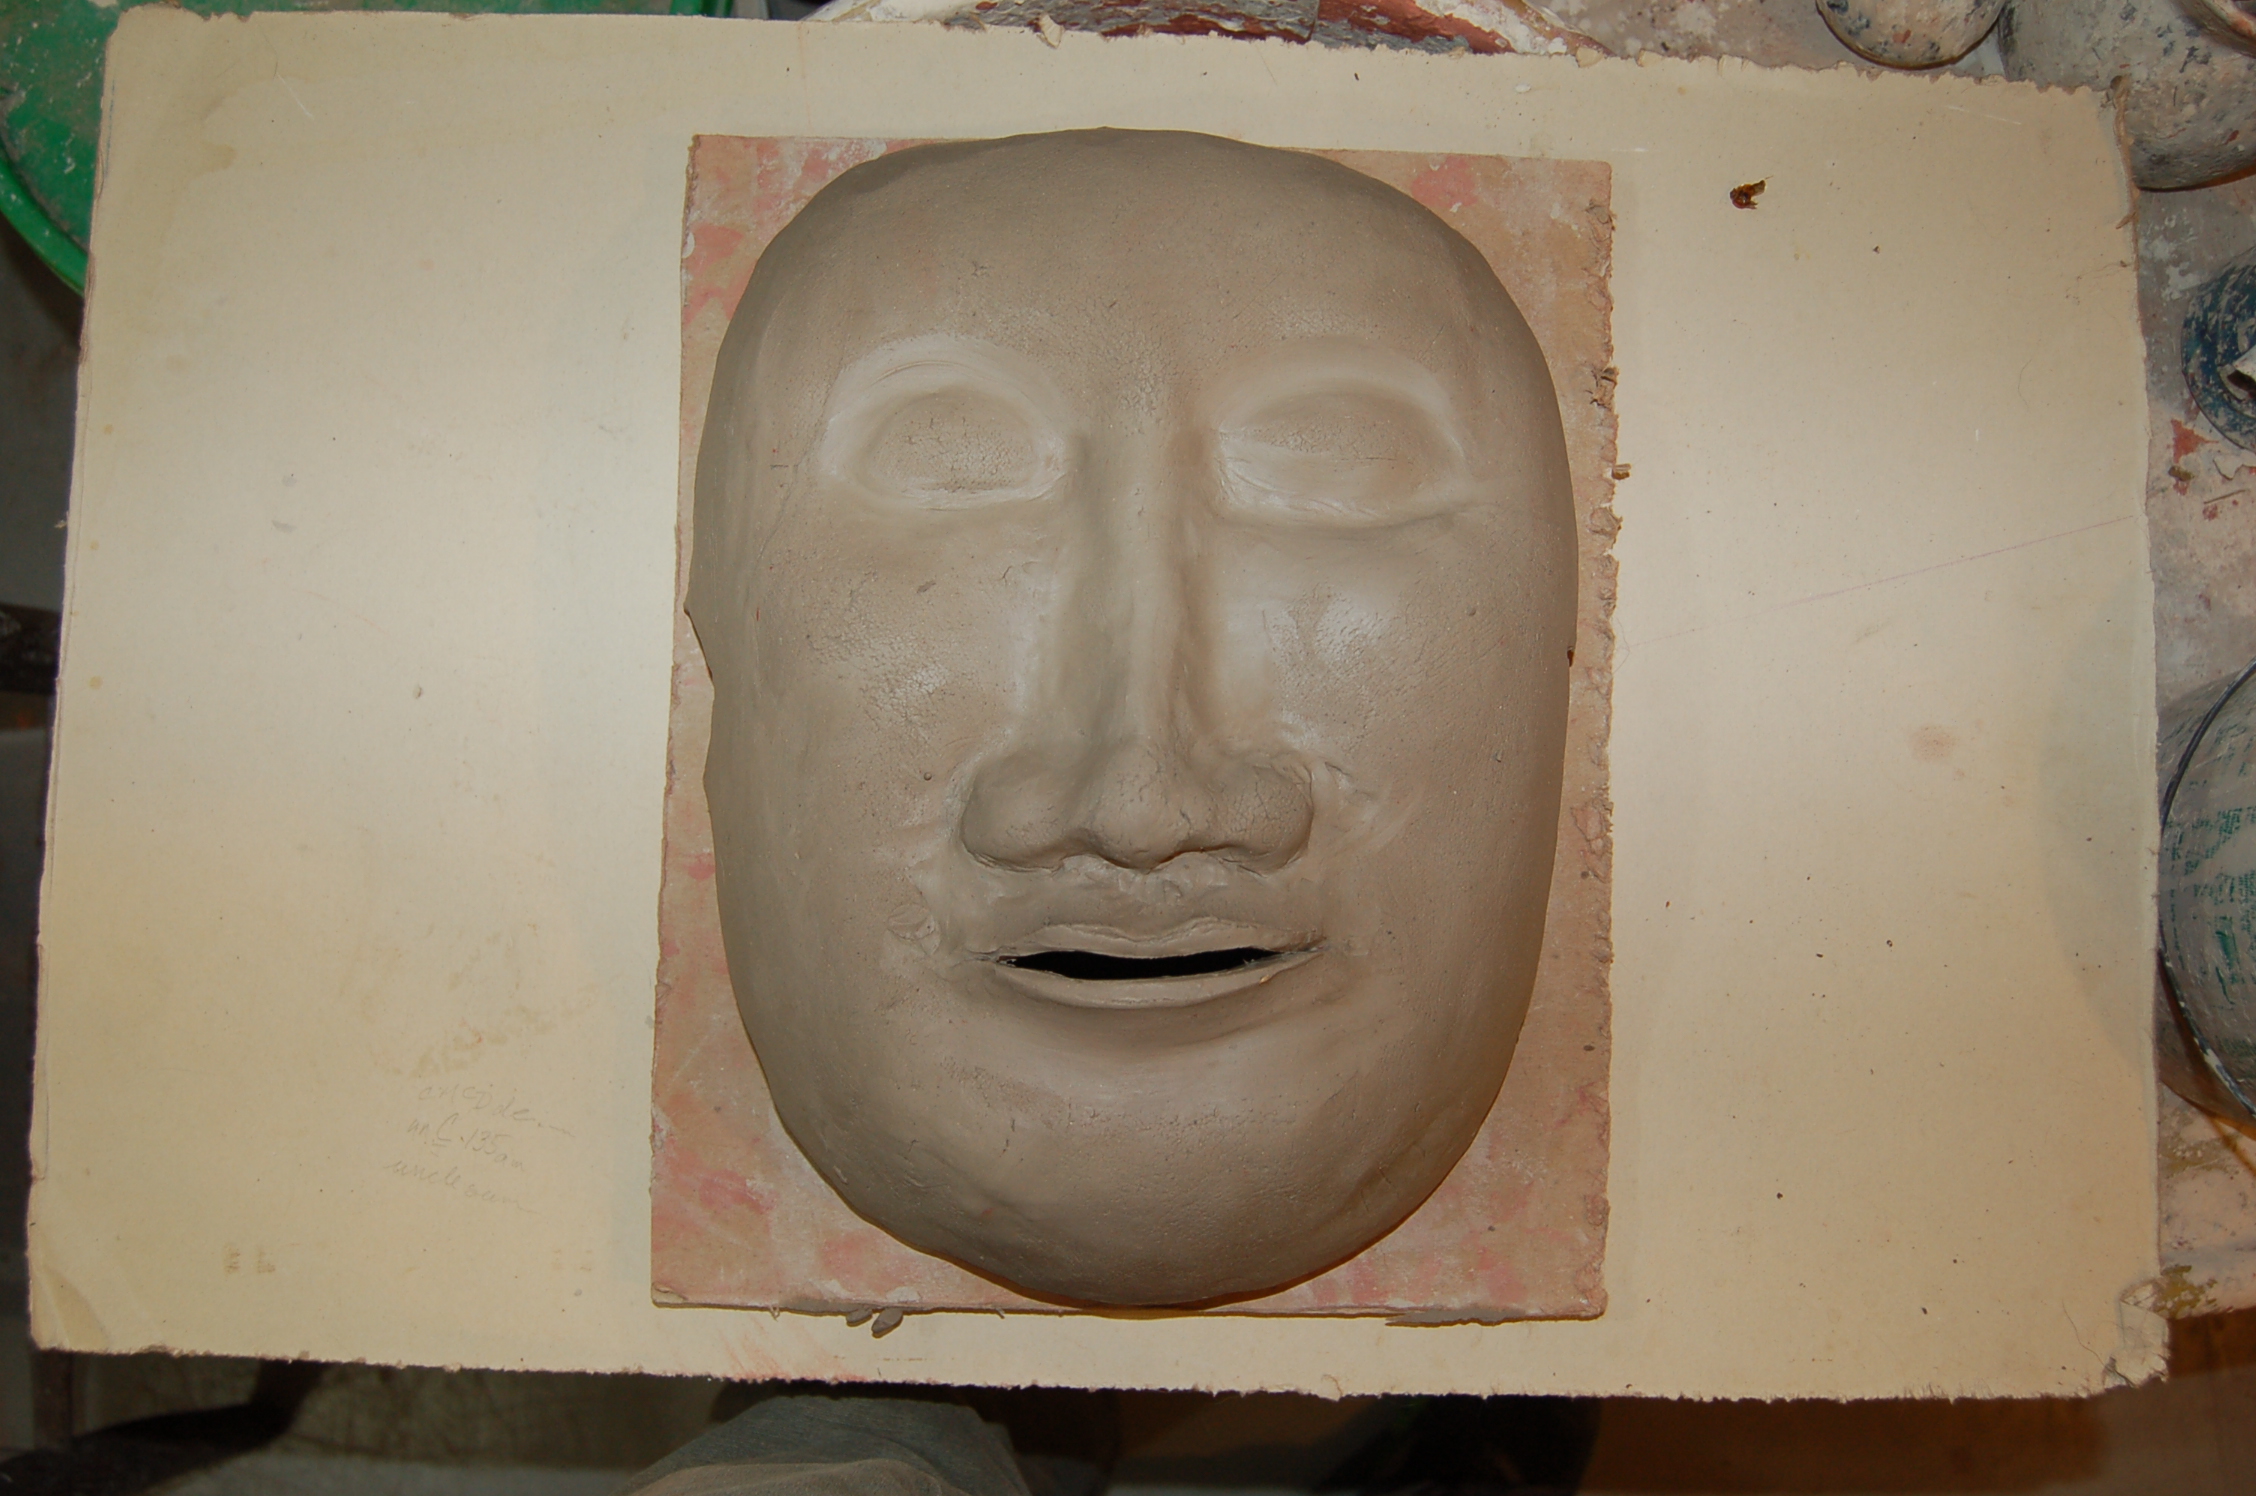
Then I wait,,,when the clay is ready, and this is crucial, it’s time to start pushing, pressing, shaving and adding clay to form a face. The clay needs to be pretty pliable but not so soft as to collapse. The thickness of the bowl helps by giving without ripping. How long to wait? That depends on the humidity and can be slowed by wrapping tight or loosely in plastic. Resist the temptation to hurry the drying as this will probably just form a stiff skin on the out side making it hard to push.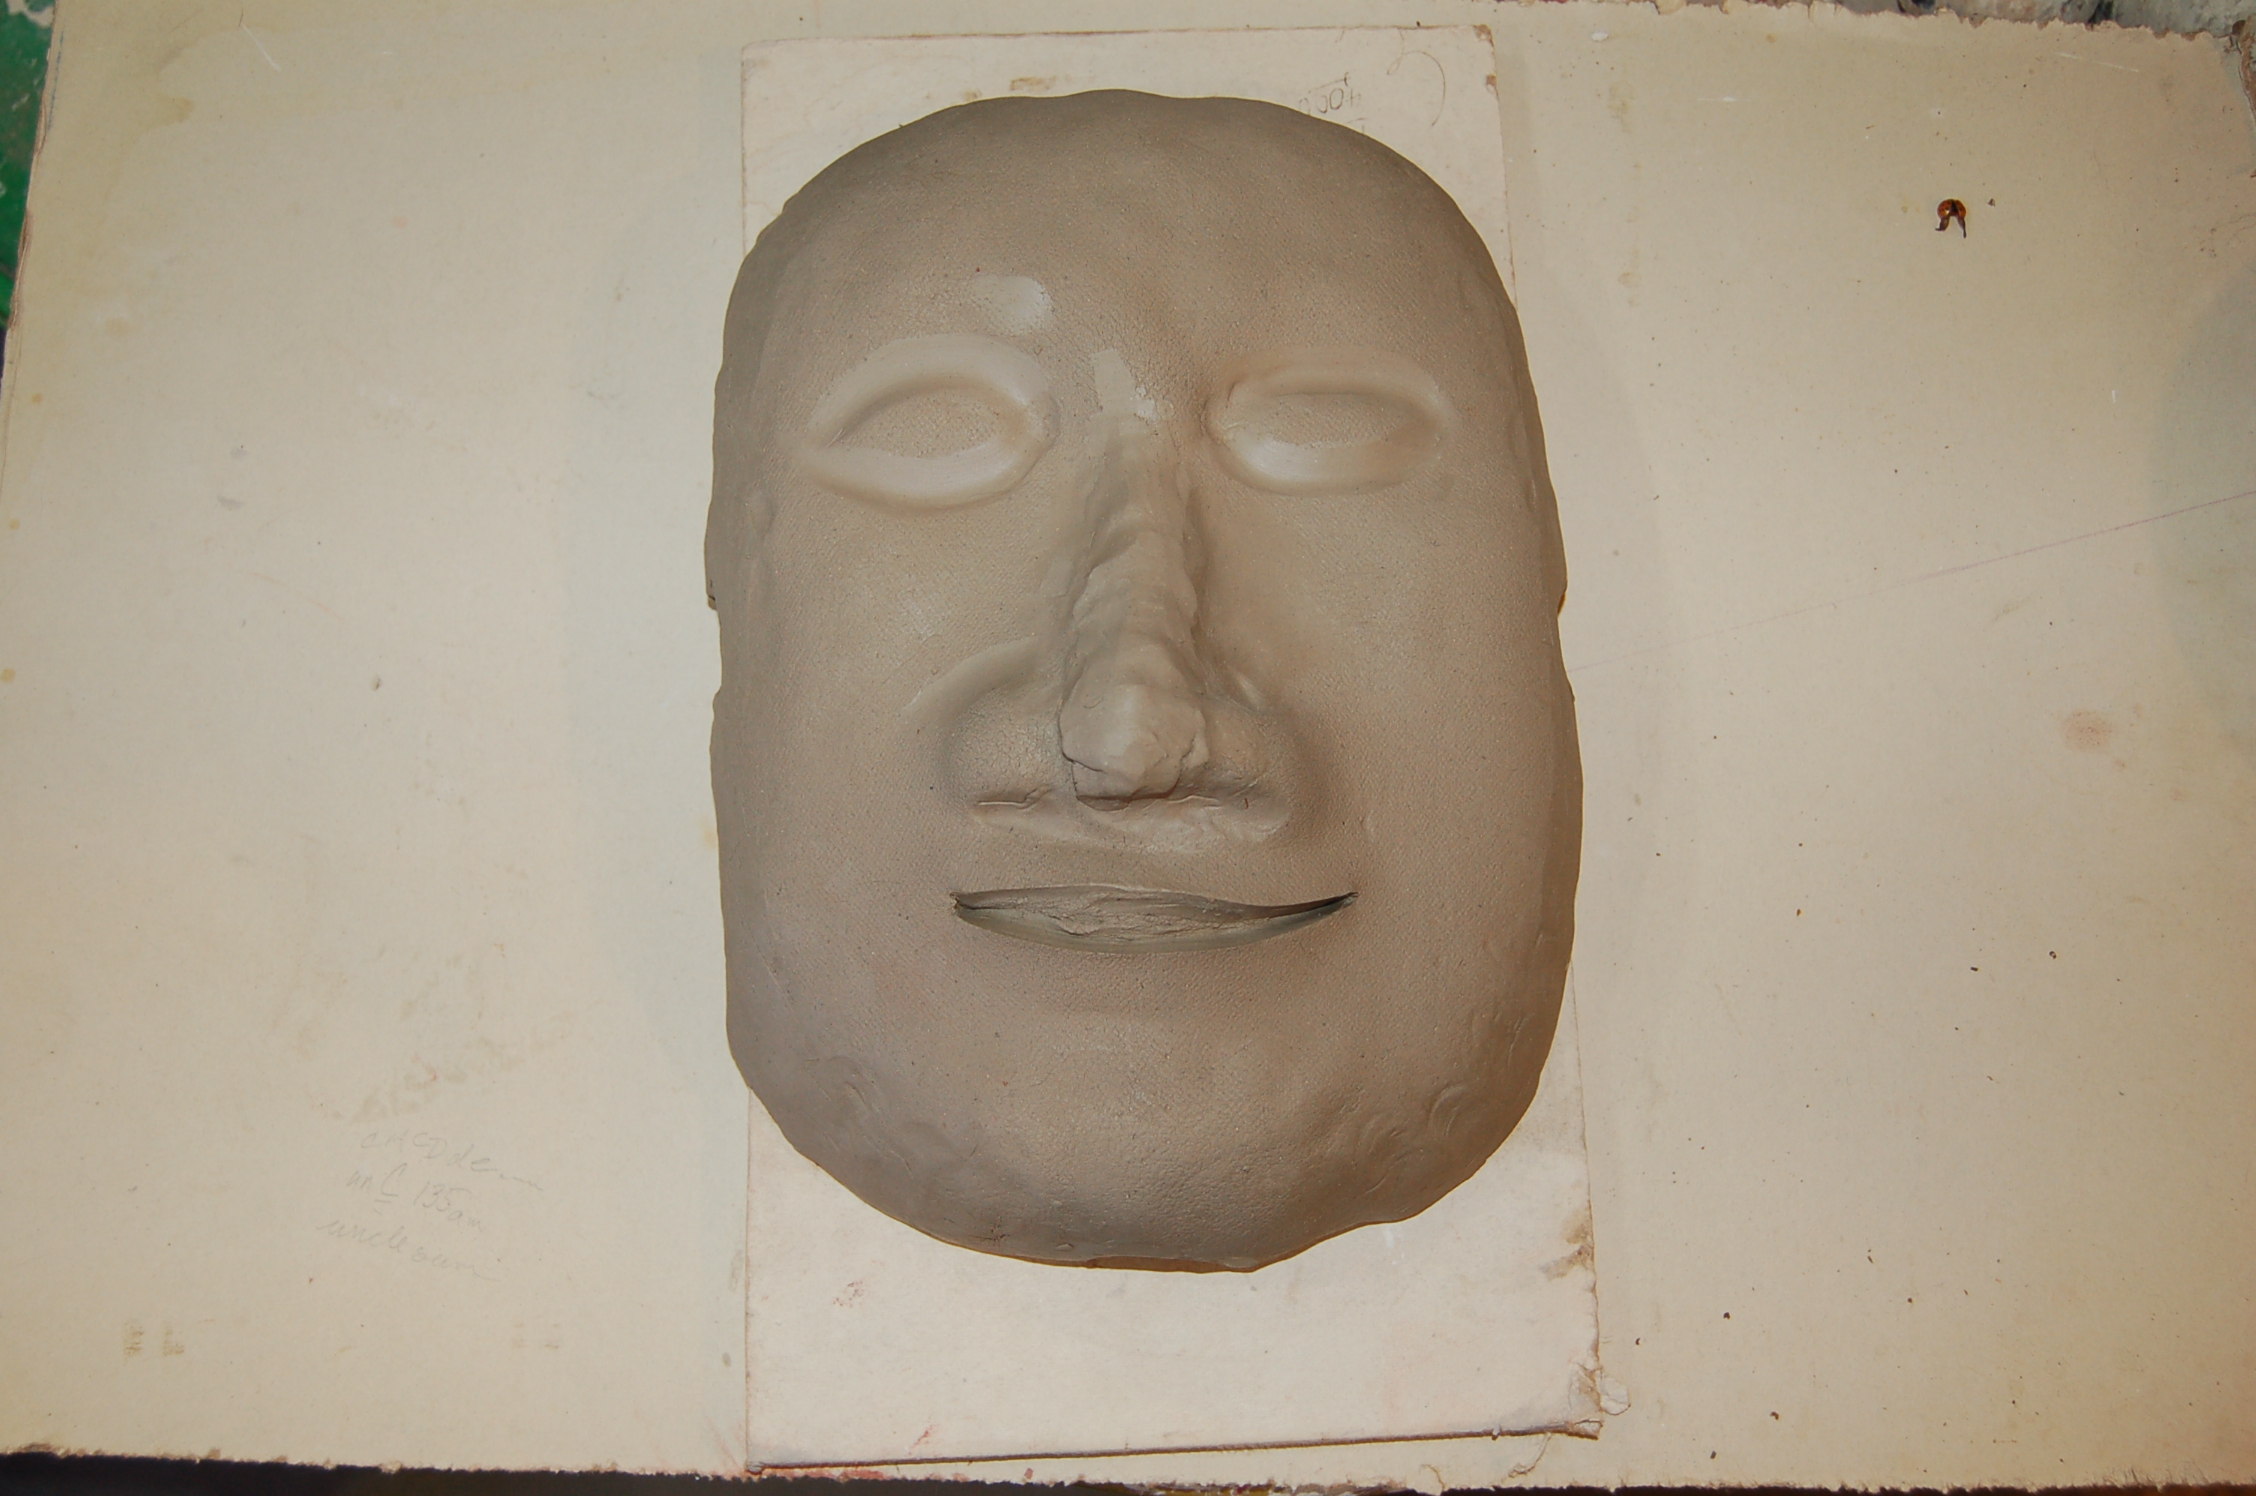
I use photos of faces, my own face and my fingers as a ruler to rough out the proportions. I concentrate on eyes, nose and mouth since the rest will be covered by leaves. It takes several days working a few hours each day to finish the face. The clay is kept moist by sponging with water and wrapping in plastic during the forming phase. This is important so the leaves will adhere properly. It also allows for fine work at the end of the process.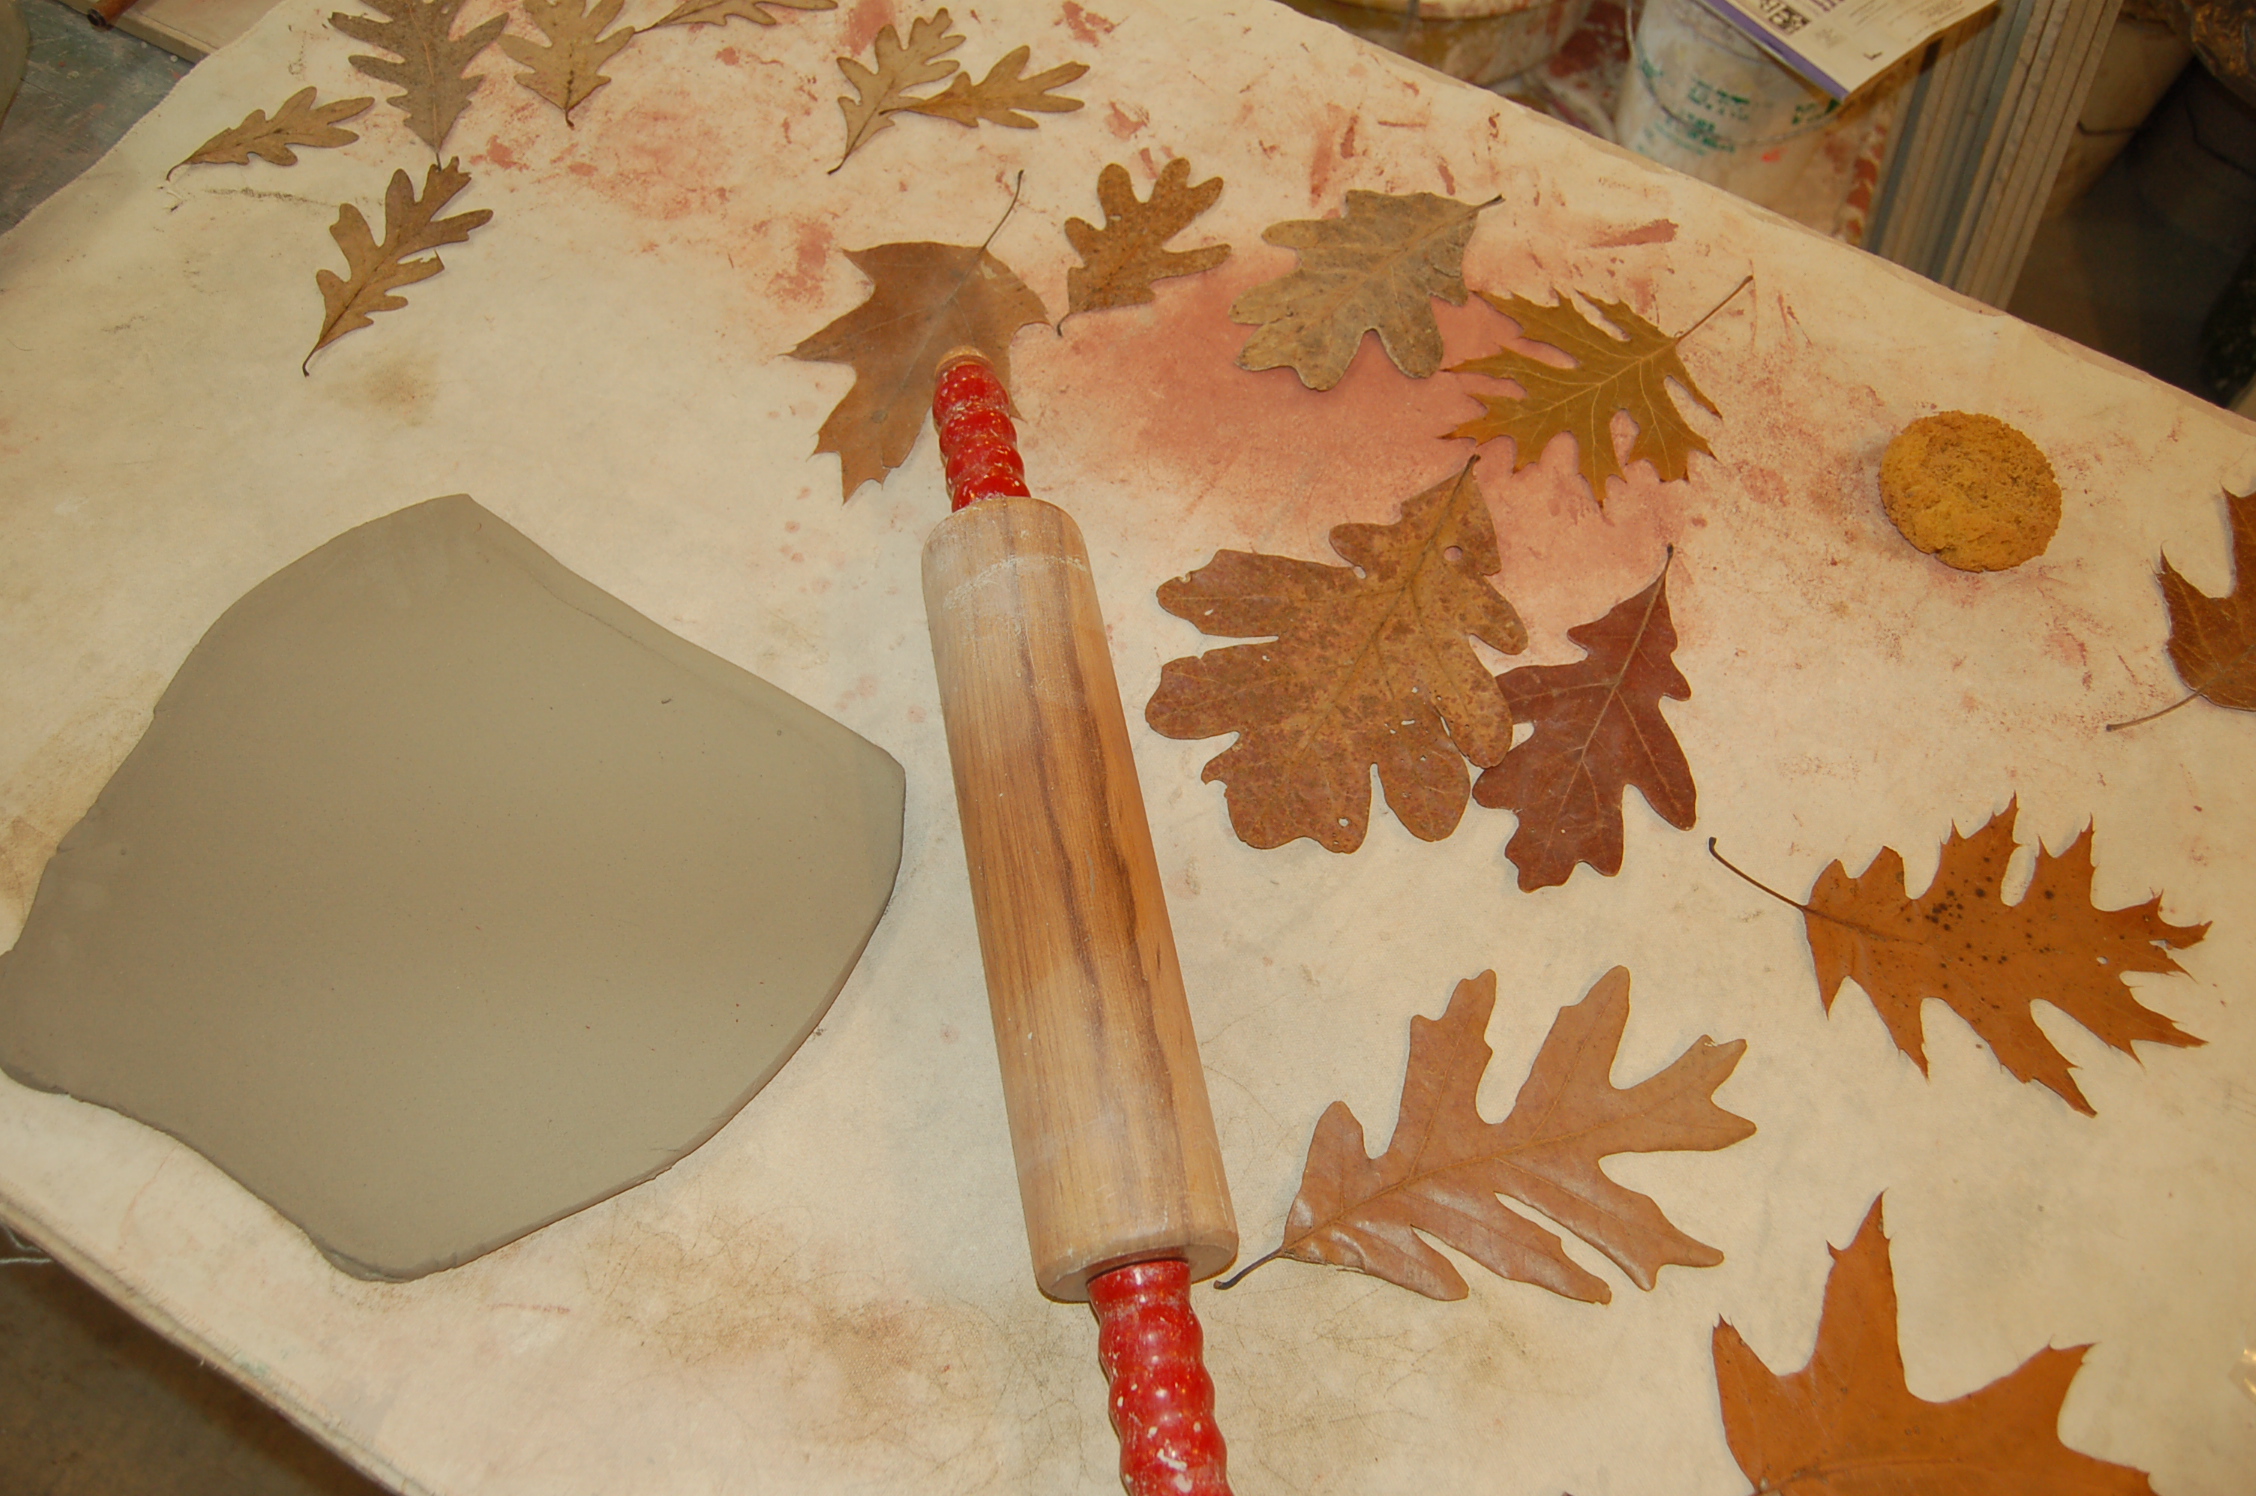
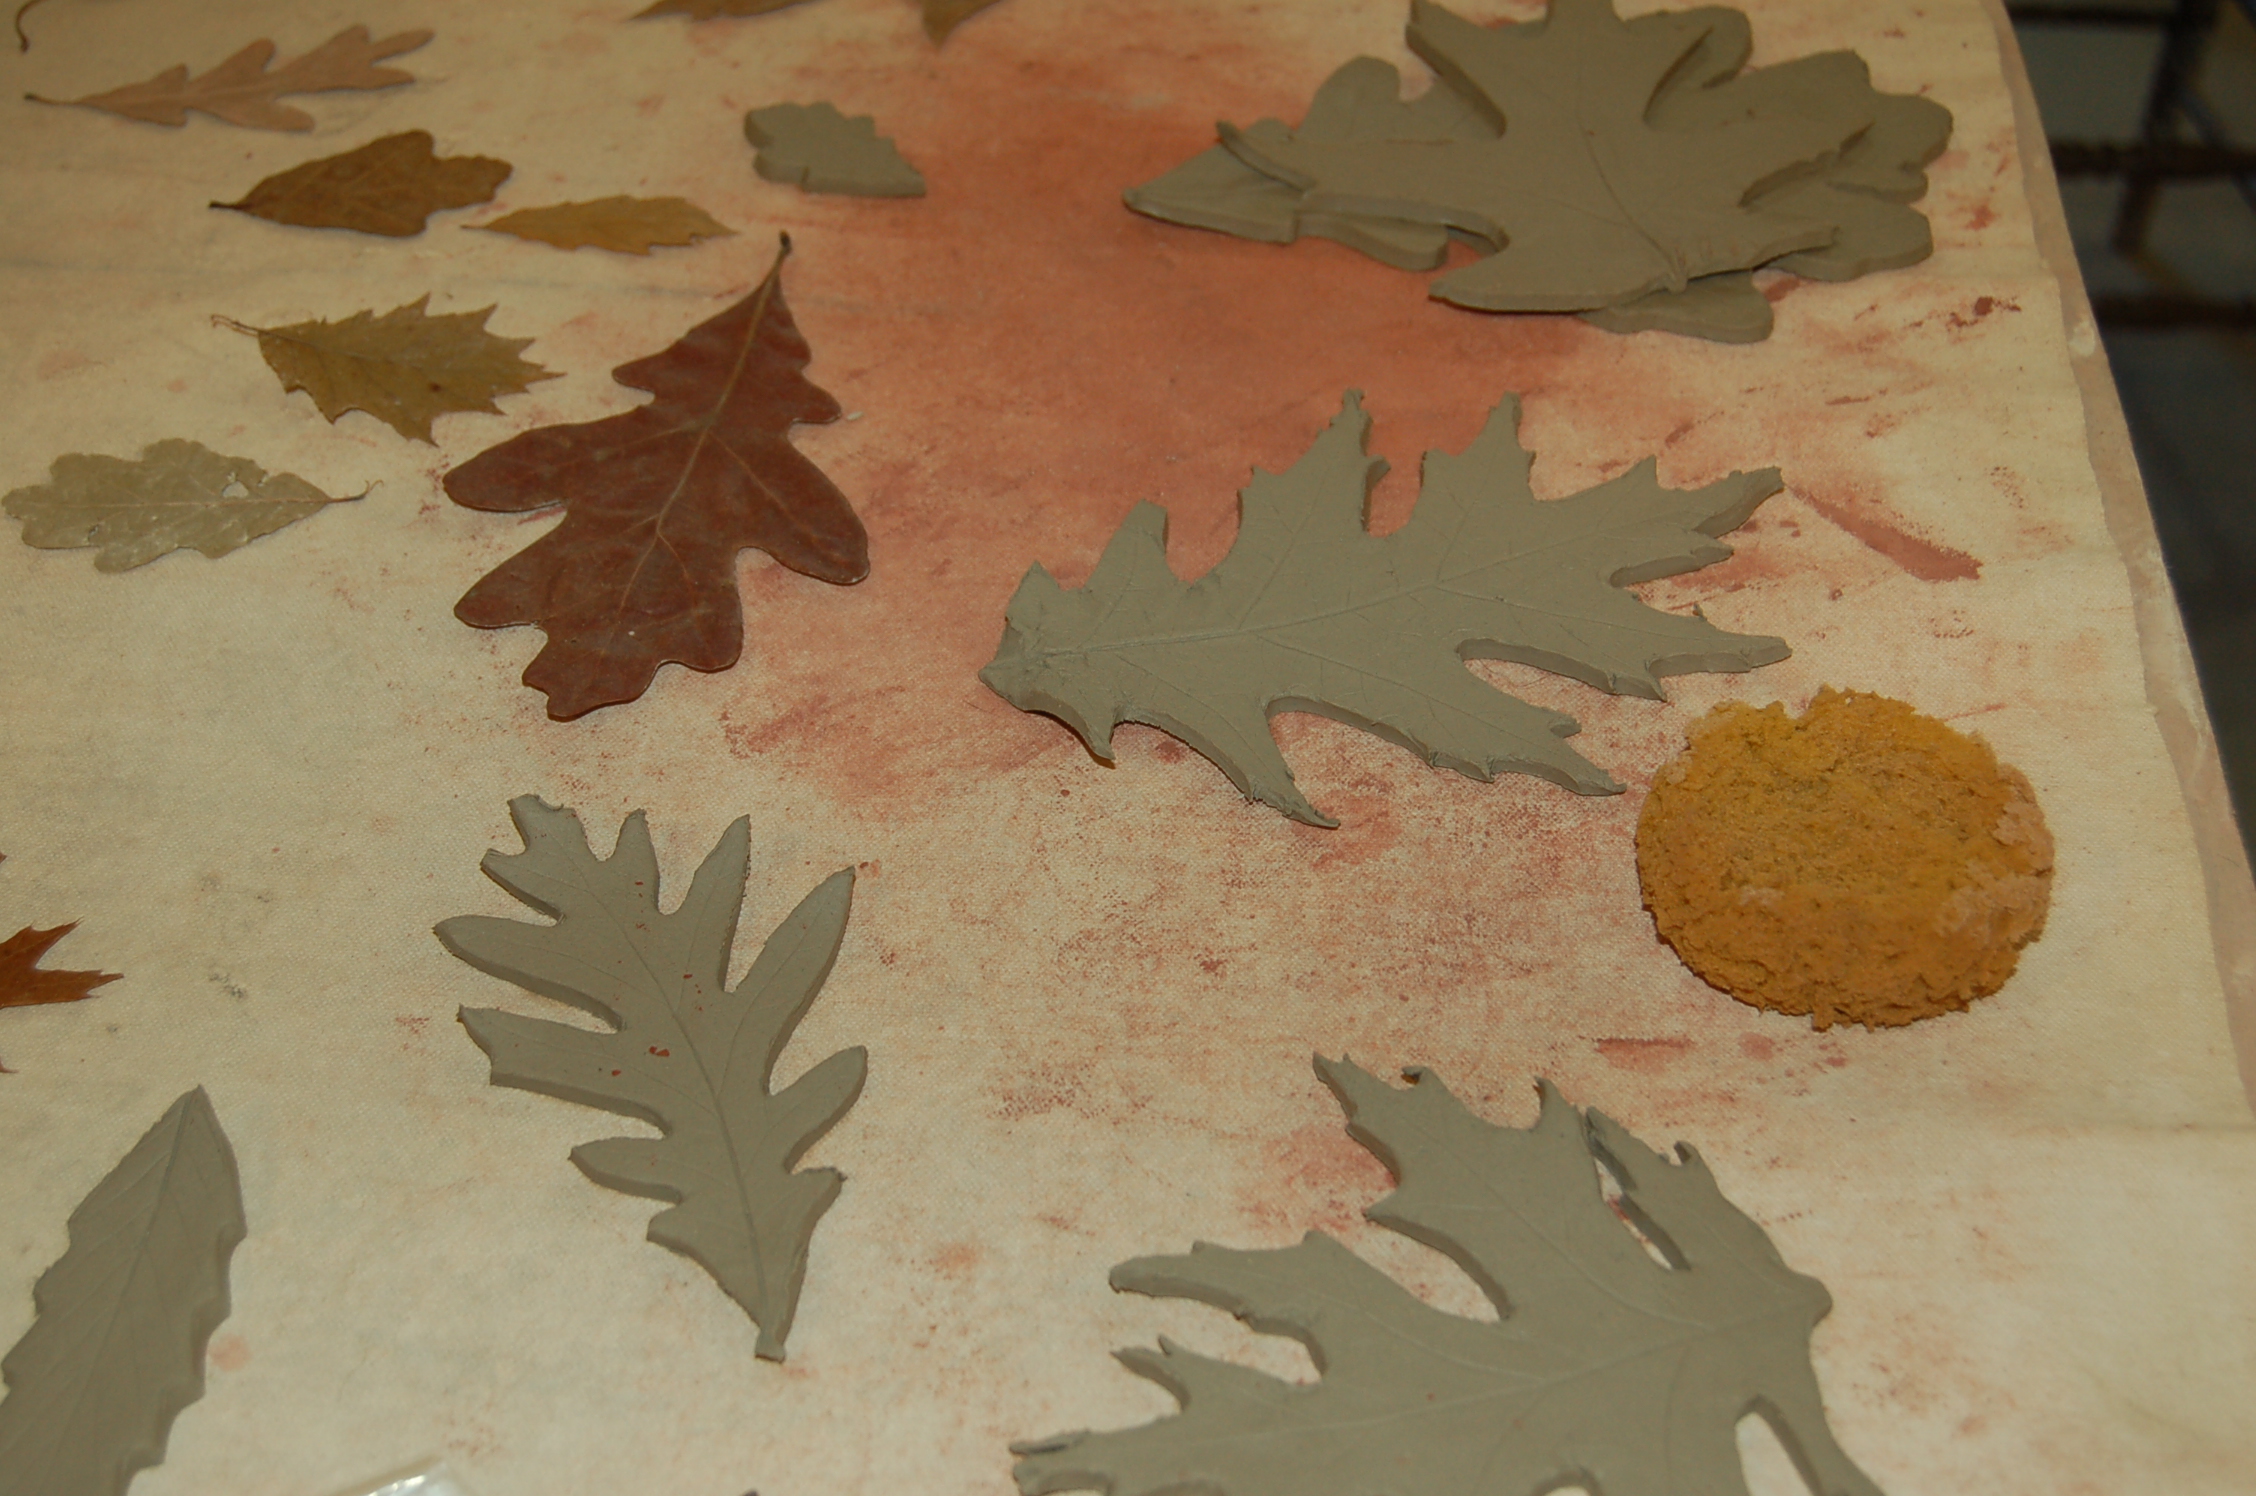
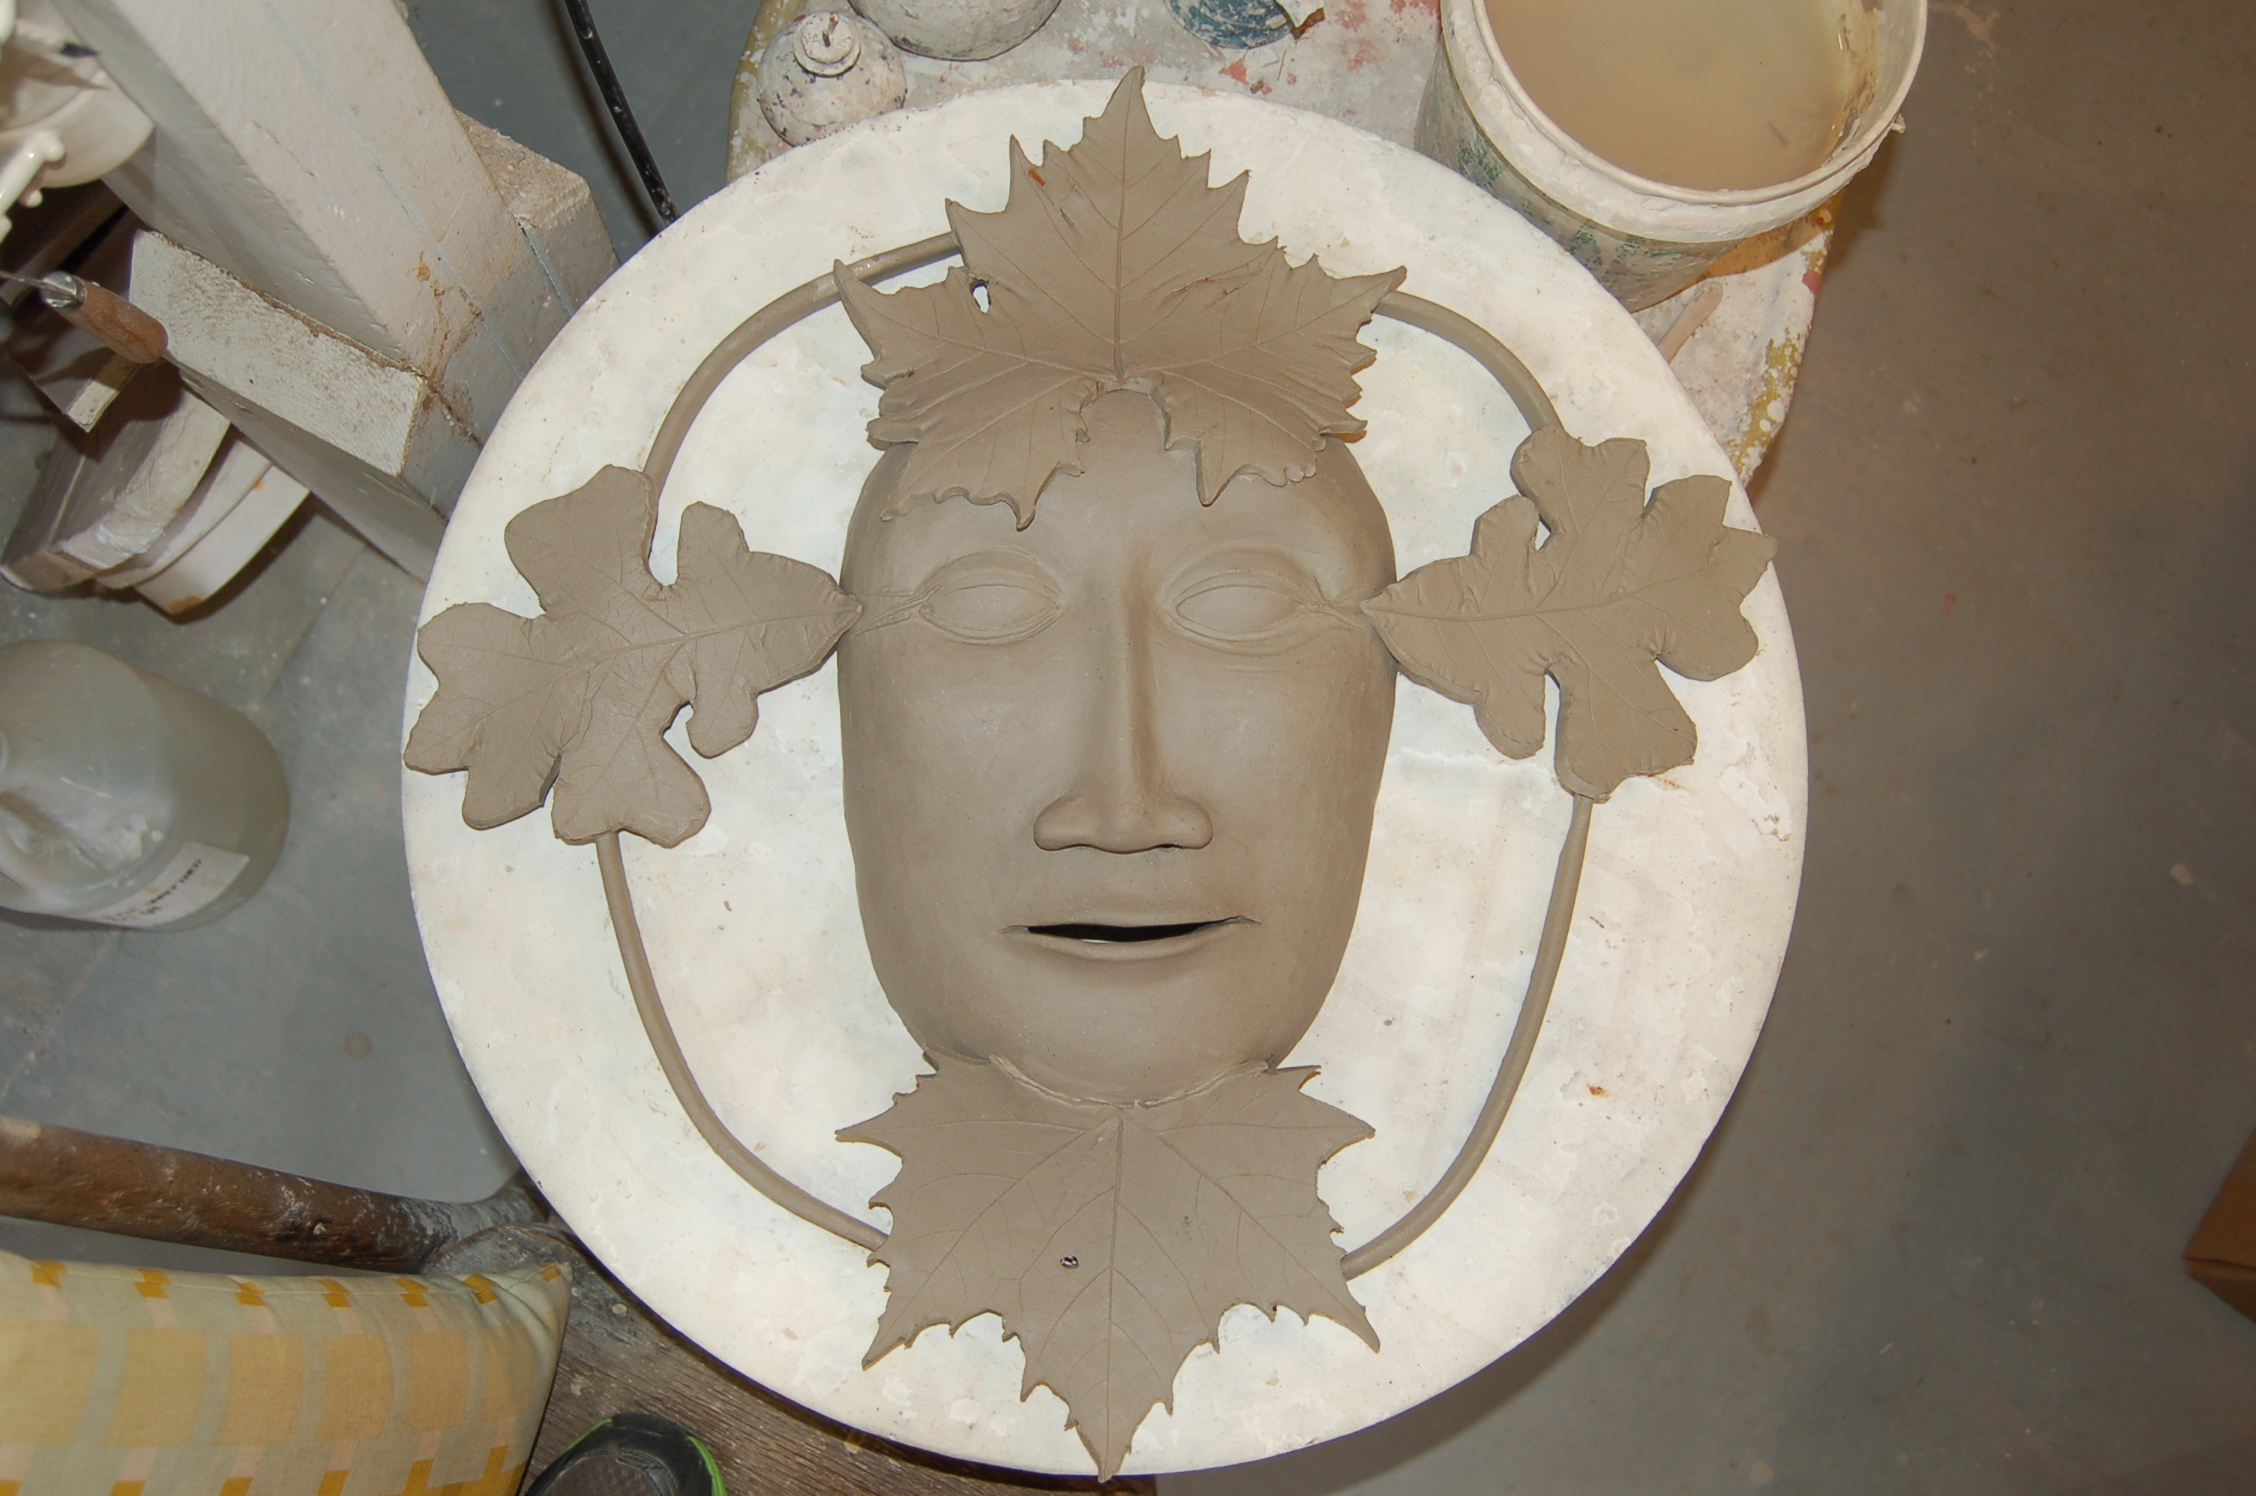
The leaves are cut from slabs of clay about 1/4″ thick. I use real leaves collected in the fall, green leaves rot quickly but some have to be used green for example grape and paw paw because they don’t store well. A large green man can take up to 36 leaves.
The assembly must be done on the kiln shelf because the piece can’t be moved once it is dry. I add a coil of clay in a circle around the face to attach the leaves and give a little space for fingers to pick it up.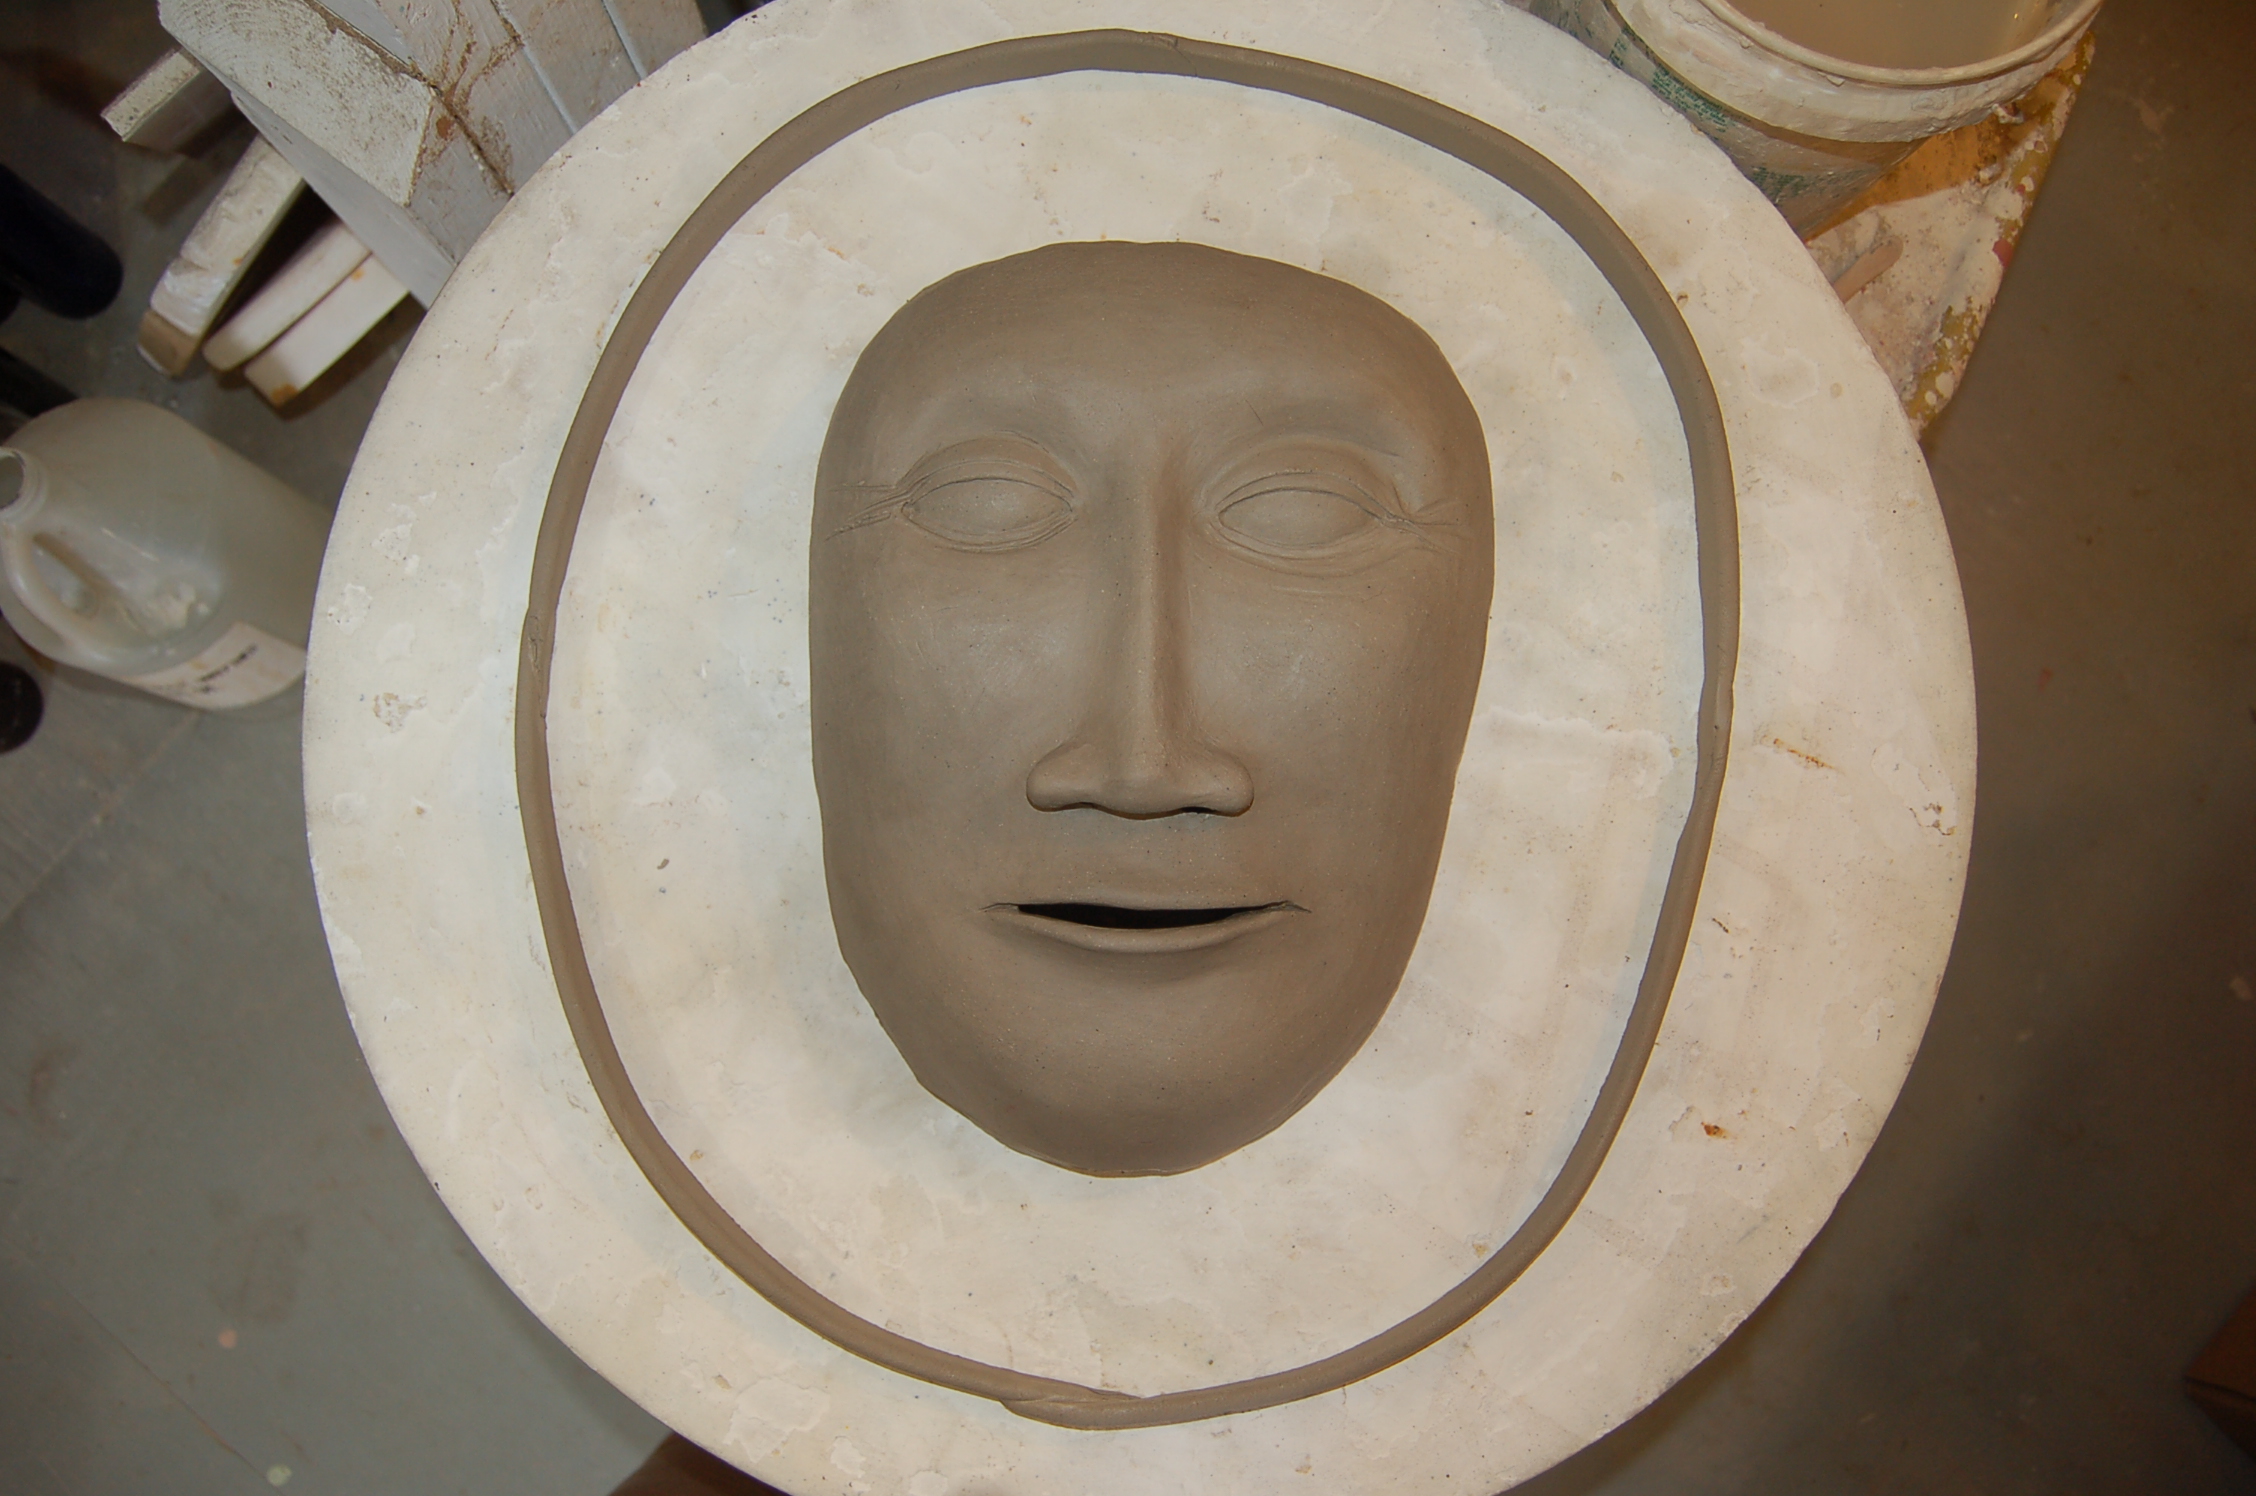
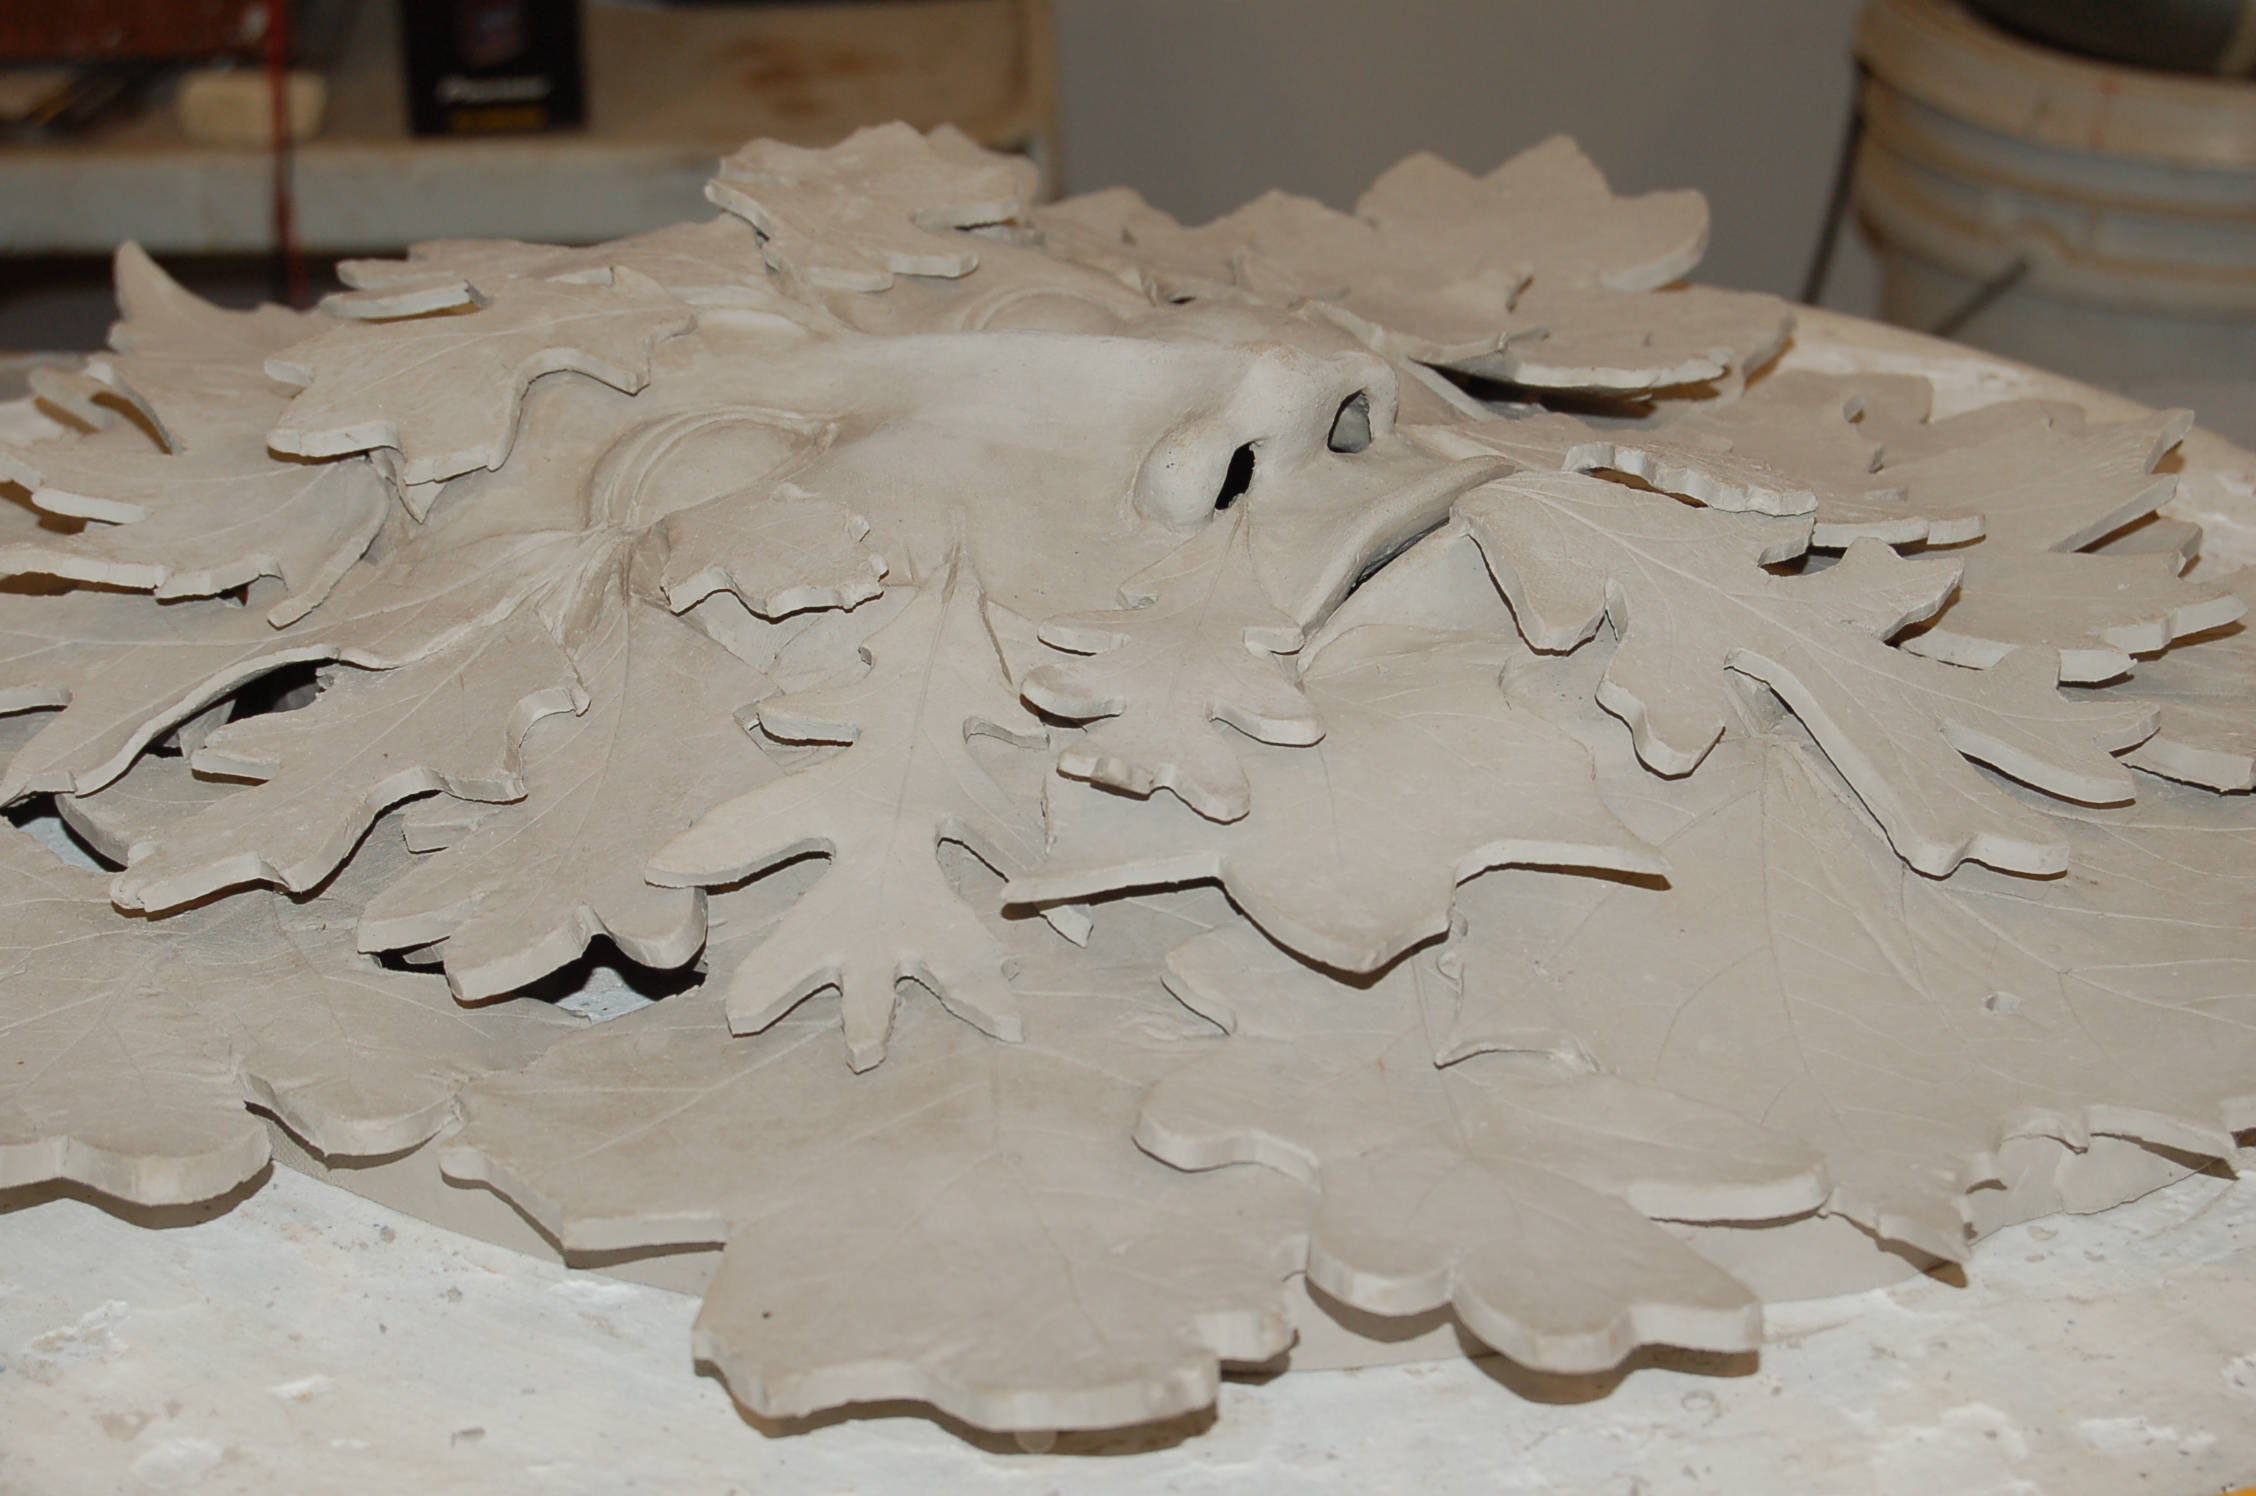
After the piece is completely dry, it is bisque fired to cone 04. The item featured here took over a week to dry because mother nature brought on the rain that week and even with fans I had to do a two day slow dry in the kiln to be sure. Be careful drying in the kiln, you can dry out the skin and leave a bit of moisture inside leading to a spectacular explosion and a pile of shards.
drying…
still drying….
After the bisque firing the piece can be handled, the dust washed off, and glaze or stains applied. One more firing to a higher temperature, cone 4, and then we wait,,,,,, for everything to cool off!
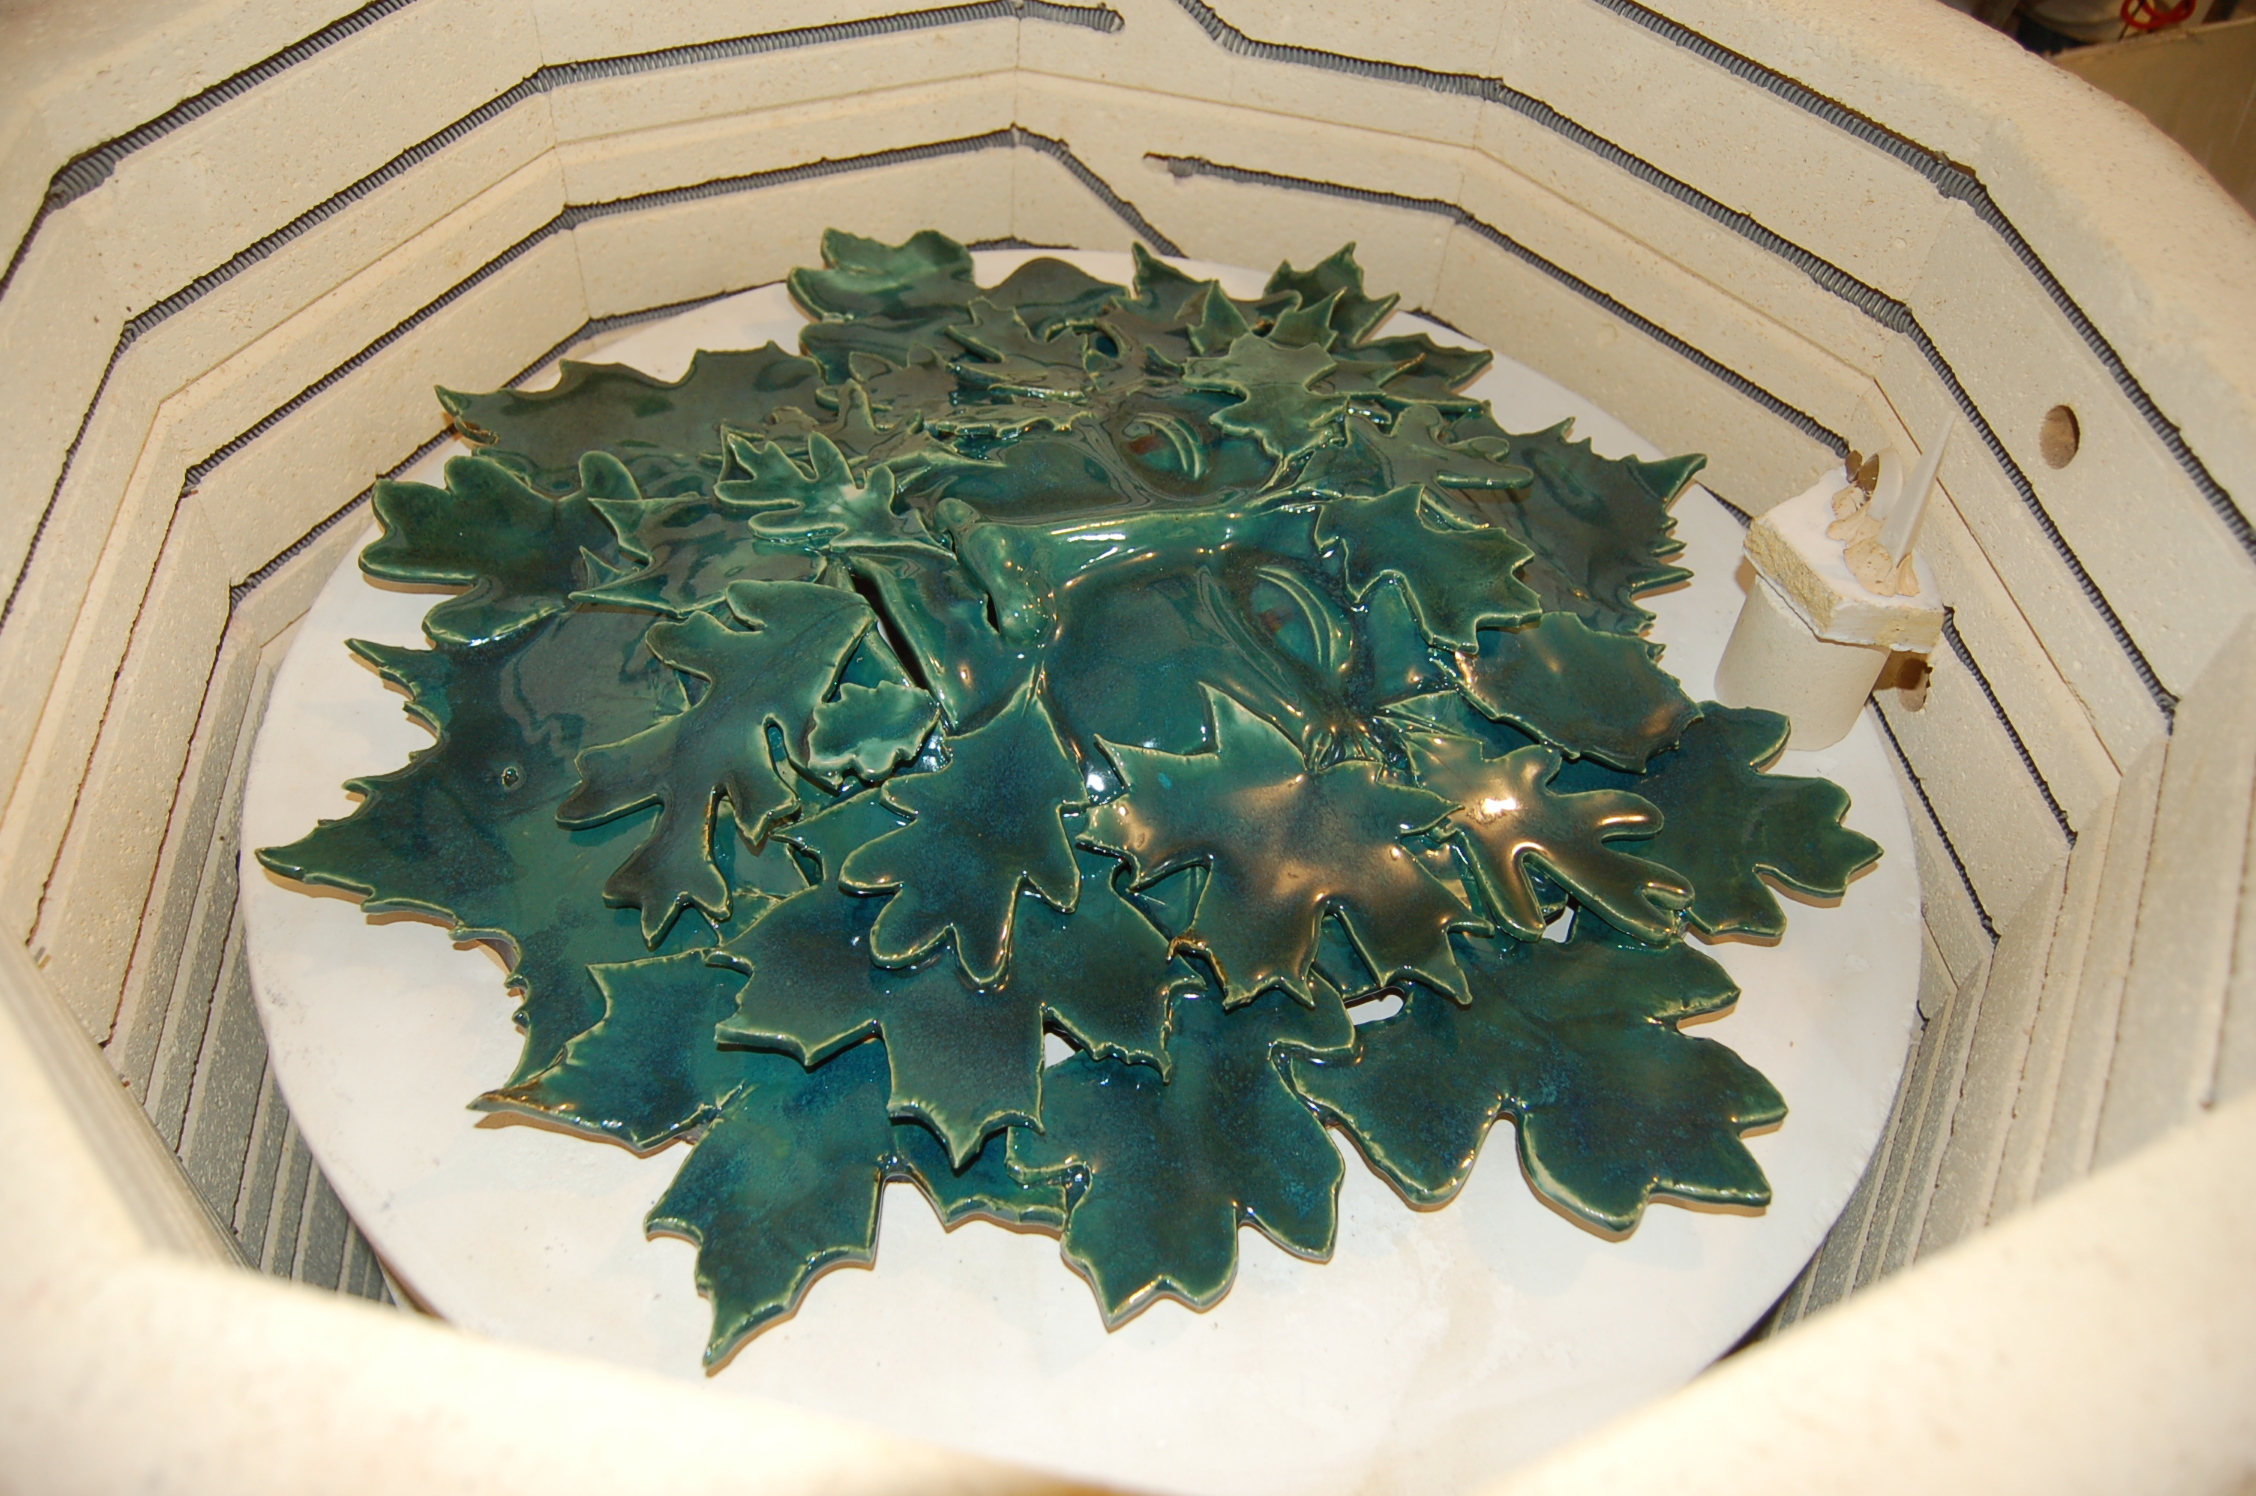
all fired up in the kiln
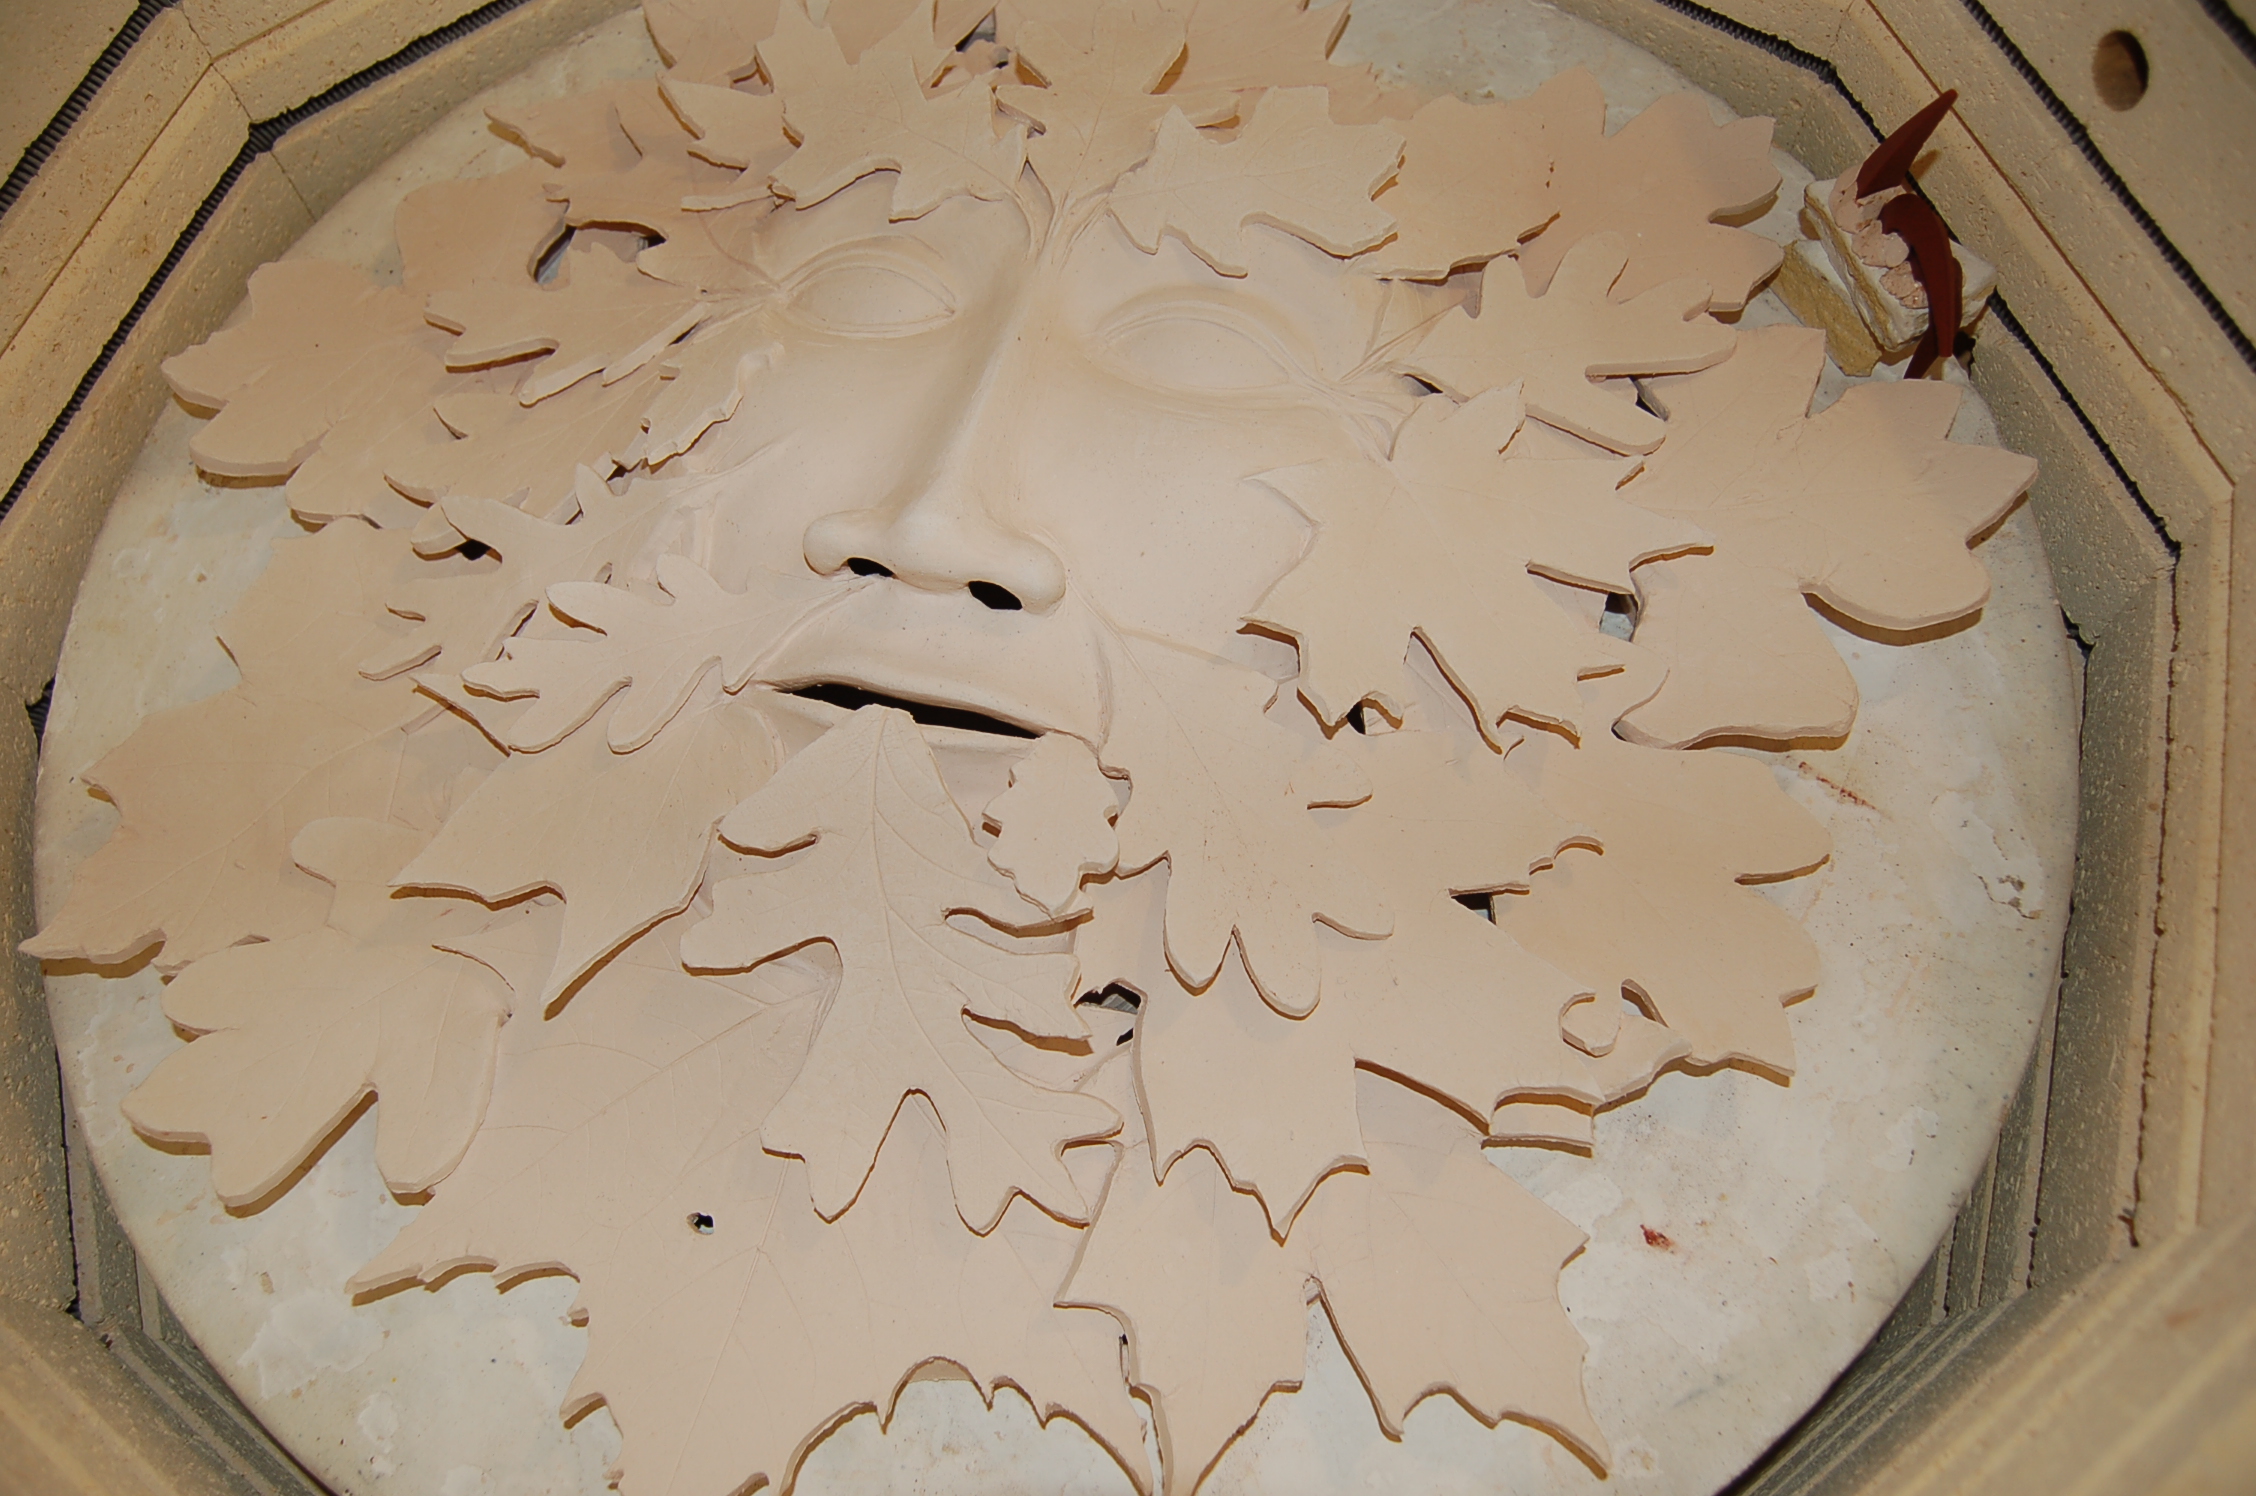
after the first firing